Upload ASDM to ASA Firewall
- Prepare TFTP Server:
- Set up a TFTP server
Tftpd64-4.64-setup.exeon a computer within the same network as the ASA firewall. - Place the ASDM image file (e.g.,
asdm-openjre-7141-48.bin) in the directory configured for the TFTP server.
- Set up a TFTP server
- Enable TFTP Server on ASA:
- Log in to the ASA firewall using SSH or console access.
- Enter privileged EXEC mode by typing
enable. - Enter global configuration mode by typing
configure terminal. - Enable TFTP server on the ASA and specify the IP address of the TFTP server:
asa(config)# tftp-server interface_name tftp_server_ip_address file_pathReplace
interface_namewith the interface through which the ASA can reach the TFTP server,tftp_server_ip_addresswith the IP address of the TFTP server, andfile_pathwith the path to the ASDM image file on the TFTP server.
- Allow Traffic Through Firewall:
- If there are access control policies or firewall rules in place, ensure that traffic is permitted from the ASA to the TFTP server on UDP port 69 (default TFTP port).
- Download ASDM Image:
- Access the ASA firewall’s CLI (Command Line Interface) via SSH or console.
- Download the ASDM image from the TFTP server to the ASA’s flash memory:
ciscoasa# copy tftp: flash:
         Address or name of remote host []? 172.16.1.1
         Source filename []? asdm-openjre-7141-48.bin
         Destination filename [asdm-openjre-7141-48.bin]?
         Accessing tftp://172.16.1.1/asdm-openjre-7141-48.bin...!!!
         !!!!
Replace
tftp_server_ip_addresswith the IP address of the TFTP server andasdm-xyz.binwith the actual name of the ASDM image file.
- Verify Image Download:
- After the ASDM image is downloaded, verify its presence in the ASA’s flash memory using the
dir flash:/command.
- After the ASDM image is downloaded, verify its presence in the ASA’s flash memory using the
- Configure ASA to Use ASDM Image:
- Configure the ASA to use the newly uploaded ASDM image:
asa(config)# asdm image flash:/asdm-openjre-7141-48.binReplace
asdm-xyz.binwith the actual name of the ASDM image file.
- Configure the ASA to use the newly uploaded ASDM image:
- Enable HTTP Server on ASA:
- If not already enabled, enable the HTTP server on the ASA to allow ASDM access:
asa(config)# http server enable
- If not already enabled, enable the HTTP server on the ASA to allow ASDM access:
- Configure Management Access:
- Ensure that management access is configured on the ASA to allow ASDM access from your management network.
- Save Configuration:
- Save the configuration changes to the ASA’s running configuration:
asa(config)# write memory
- Save the configuration changes to the ASA’s running configuration:
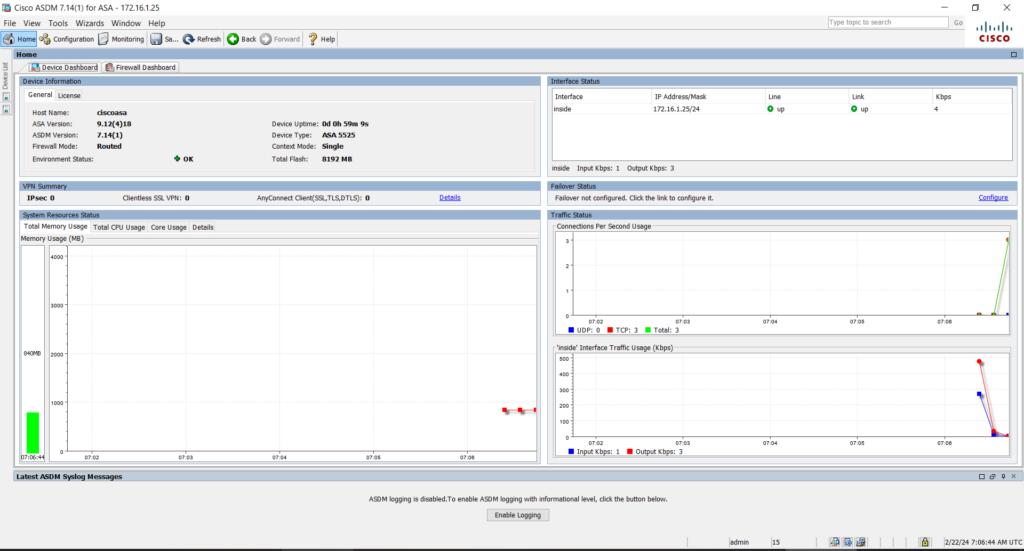
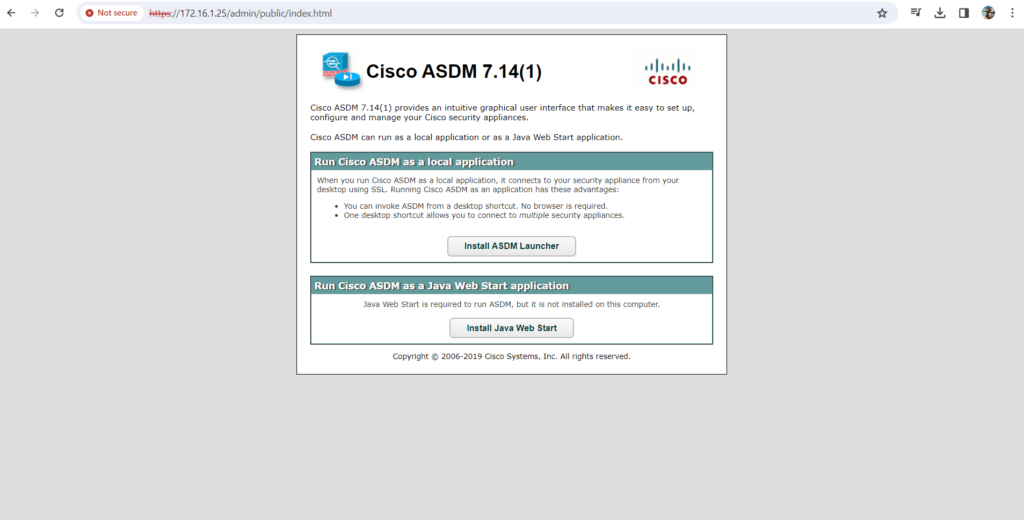
- Access ASDM:
- Install
jre-8u401-windows-x64.exe - Open a web browser and navigate to the ASA’s IP address using HTTPS (e.g.,
https://172.16.1.25). - Log in using your ASA credentials.
- Download and install the ASDM launcher if prompted.
- Install